10 Essential Studio Items
Creating music is no longer the privilege of professional musicians and composers working in extravagantly equipped and exclusive studios. With a few items of potentially affordable kit we can all make music in our own homes, and if we chose the kit thoughtfully, there’s no reason why the music we make won’t be commercially releasable. But what kit is required, and how do we make the right choices? In this blog post we’re going to run through ten indispensable items of home studio kit that could put you on a path to anything from a creatively satisfying home hobby, to musical stardom.
#1 – Computer
Although there are a number of contemporary all-in-one multi-track recording solutions (direct descendants of the audio cassette based multi-trackers of the 1980s) available, if you want to access the full creative potential of contemporary digital audio workstation (DAW) apps and plugins, then a computer is obligatory. You can go with the Windows or Mac OS operating systems; either will allow you to make great music, however one advantage Mac has over Windows is that Apple’s hugely popular and capable Logic Pro DAW app is not Windows compatible.
Whether you use Windows or Mac OS however, remember that music production can be pretty demanding in its computer processing power and data storage requirements. So while it may be feasible to begin by using an existing laptop or desktop computer, you’ll possibly find that it soon runs out of processing power or hard disk space. When that happens, it makes sense to consider a dedicated music making computer; one with as much processing power and disk space and you can possibly afford. It will also need USB, Thunderbolt or Ethernet sockets to connect the next item on our kit list.
#2 – Audio Interface
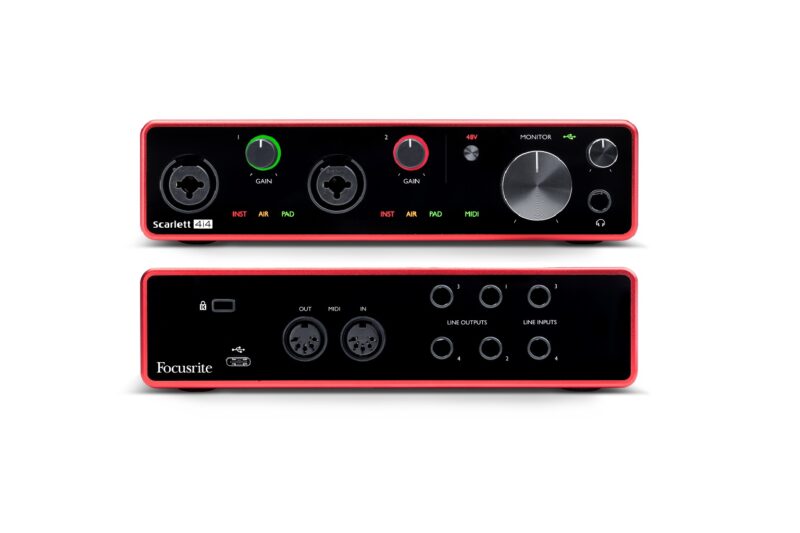
The audio interface (sometimes known as a “sound card”) is the bridge between your external audio hardware and your computer. The interface firstly takes input signals from microphones and instruments such as electric guitars and keyboards, digitizes them, and routes them to the computer to be recorded, processed, edited and mixed in the DAW. Secondly, the interface takes audio outputs from the DAW and routes them to studio monitors or headphones. Multi-track recording is made possible by the interface being able to do its input and output jobs simultaneously.
Although audio interfaces that connect to the computer via Ethernet and Thunderbolt are often found in large commercial studios, USB connection is by far the most common format and probably the best suited to home studios. Audio interfaces are available with different quantities of inputs and outputs, and the number that suits your needs will depend on the type of music you make and your recording techniques. If, for example, your music is entirely electronic, created predominantly via software synths and beats, you may have no need for more than a couple of audio inputs and outputs. If however you record more conventionally with multiple musicians playing simultaneously, you might need an interface with four or even eight inputs. Similarly, when considering interface outputs, if you plan to work alone with just studio monitors and headphones, a stereo output for each may well be enough. But if you need to provide headphone mixes for multiple musicians, or are intrigued by the possibilities of multi-channel immersive formats such as “Dolby Atmos”, you’ll need ten or more outputs.
#3 – Digital Audio Workstation (DAW)
Your computer will need to run a Digital Audio Workstation software, commonly known as a DAW. The DAW is an app in which you record, edit and playback the audio (or MIDI) files that together comprise a piece of music. In that respect, a DAW is analogous to a multi-track tape recorder. But a DAW is also analogous to a mixing desk in that it enables sounds to be mixed together and modified by effects such as reverb, equalization, or compression (just to name a few). The DAW is effectively a complete recording studio in a box, and the phrase “in the box” has come to mean composing and producing music entirely within a computer.
The choice of DAW will depend on your budget, your aspirations, and to some extent the style of music you want to compose and record. Two of the most popular DAW apps are “Avid Pro Tools” and “Apple Logic Pro”. Pro Tools tends to be favored those who have experience of music production with traditional audio hardware, whereas Logic Pro attracts a broader range of users. There are numerous alternatives, each of which serves a different niche and budget. If you’re a Mac user for example, you can begin inexpensively with “Garageband” and upgrade to Logic Pro. And if your compositional style is predominantly loop and sample based, then “Ableton Live” is likely to be interesting. Other commonly used DAWs are “Cubase” by Steinberg, “FL Studio” by Image-Line, or “Reaper” by Cockos.
Choosing the right DAW requires a bit of research but there are numerous online blogs and resources that can help (or add further confusion).
#4 – Microphone
Even if your instinct and comfort zone is centered on creating music entirely electronically, having at least one general purpose studio quality microphone is much more than just a good idea. That’s not only because even the most electronic of compositions can often be given a whole new personality by the addition of some genuine acoustic elements, capturing real sounds with a microphone has a magical way of stimulating composition and creative expression. There is so much enjoyment, for example, to be had in recording the sounds of everyday life and molding them into something new and exciting. And that’s even before you’ve decided that the instrumental piece you’re composing really needs a rap vocal on top. Second only perhaps to an acoustic guitar, a microphone is the most inspiring piece of kit, and you’ll need one anyway to record that guitar.
Studio microphones generally come in three different flavors: dynamic, condenser or ribbon. We’ll discount ribbon microphones for the purposes of this article because they have very specific characteristics that suit them to particular recording niches. The most exclusive and highest performing studio microphones are, with few exceptions, condenser mics, but there are countless entry-level and affordable condenser mics available, many of which are perfectly suited to start-up home studio needs. Dynamic microphones have a reputation for bullet-proof dependability over ultimate sound quality, which is why the majority of live performance vocal mics are dynamic. However, there are a number of affordable dynamic mics available that can compete with equivalently priced condenser mics on sound quality grounds, so one of these might actually be the best option for a start-up home studio. It’ll sound good and never let you down, condenser mics, in contrast, don’t often respond well to being dropped.
#5 – Studio Monitors
As primarily a manufacturer of studio monitors you might have expected us to put them at the top of this list. But no, even we have to admit that you need to make some music with a computer, interface, DAW and microphone before you can listen to it. That’s not to say however that high performance and trustworthy monitoring is not important. It is vitally important.
Appropriate studio monitors for a start-up home studio will almost certainly fall into the “nearfield” category (for example the ADAM Audio A7V) . The term “nearfield”, when applied to monitoring, describes relatively compact speakers that are intended for solo listening at a distance of up to around 2.0 m. Commercial studios often use larger “midfield” monitors for greater listening distances and volume levels, and substantial main monitors for even larger scale and higher volume listening (e.g. ADAM Audio S3V).
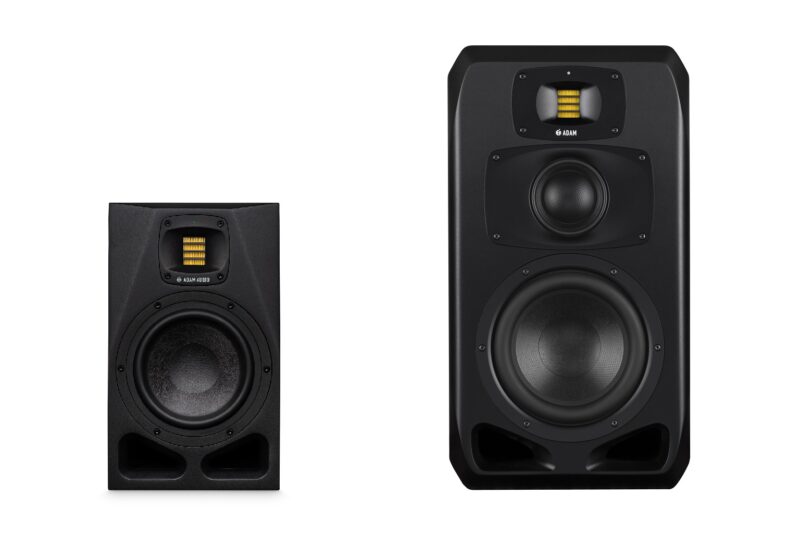
A number of factors come into play when selecting the right nearfield monitors for a home studio. Firstly, you need speakers that physically fit your working space and that you find comfortable listening to for potentially long periods. Secondly, you need speakers that offer high enough audio performance and tonal accuracy that they will provide a reliable reference in terms of how your music translates to other playback devices; smartphones, in-car audio systems, vinyl, streaming services, headphones, etc. And thirdly, selecting speakers that suit the kind of music you expect to make is important. If, for example, your genre of choice is EDM, high volume levels and extended low frequency bandwidth will likely be important to you. If however you most often find yourself composing with acoustic instruments and vocals, natural accuracy of tone through midrange frequencies might be the priority.
You can learn much about the comparative strengths and characteristics of different studio monitors by examining manufacturers specifications and reading reviews (using the ADAM Audio A7V here as an example, again) but it’s also important to listen to a few options in your price range before making a decision. If you need any recommendations, please don’t hesitate to contact us!
By loading the video, you agree to YouTube's privacy policy.
Learn more
#6 – Headphones
There’s two reasons why headphones make it onto this list. Firstly, if you’re recording acoustic instruments you’ll need to use headphones so that sound from your monitors doesn’t leak into the microphone (recording engineers call such undesirable sound leakage, “spill”). Spill is particularly a problem if you’re over-dubbing an acoustic instrument or voice onto a backing track. In fact, you may actually need two pairs of headphones, because if your role in a creative process is to be the recording engineer, while somebody else plays or sings, you’ll both need to hear what’s going on. The second need for headphones is to provide an alternative playback device to your monitors. An alternative is desirable because, if you’re working in a shared space, others will need an occasional break from your work (or “noise” as they might perhaps describe it), and because so much music is consumed via headphones these days it makes sense to be able to hear your work presented in that manner.
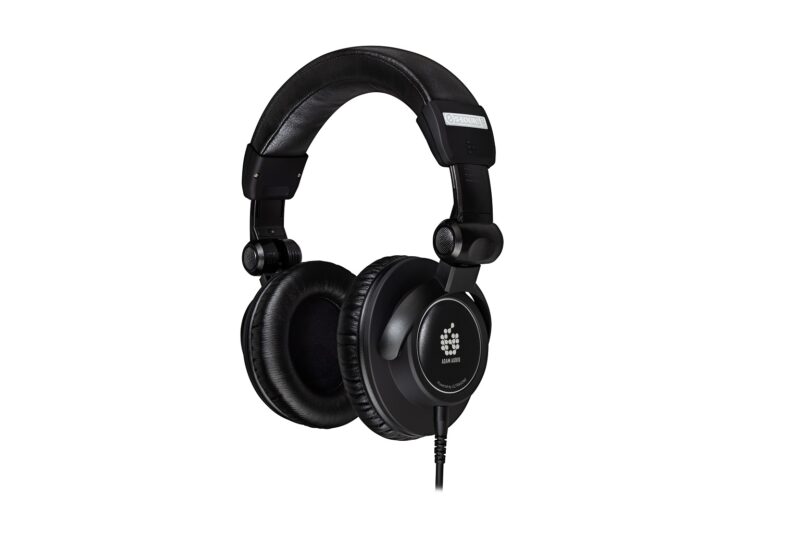
There are countless different headphone models to choose from, in styles that range from earbuds to traditional ear-cup and headband types, and at prices that range from affordable to less so. Choosing the right headphones might seem daunting, however the needs of home studio work narrow the choices down a little. Firstly, you need what are known as “closed back” headphones (like the ADAM Audio SP-5). These are headphones that cover the entire ear and allow very little sound to escape. Secondly, you’ll want headphones that are not too heavy and are comfortable to wear for long periods. You’ll also want conventional, wired headphones, because reliability is important and audio interfaces tend not to be fitted with Bluetooth transmitters. Lastly, studio headphones tend to take a bit of rough handling, so you’ll want a model that’s robust and reliable, and perhaps has replacement parts available from its manufacturer.
(We put together a little tutorial or guideline regarding the usage of studio monitors vs. headphones explaining “What To Use When“.)
#7 – Hard Drive
Item seven on our list isn’t exciting or even creatively inspiring, but it’s one that the lack of has ended many a recording session. It’s an external hard disk to augment the internal storage of your DAW computer. As we described right at the beginning of this article, audio recording consumes a lot of data storage and if you run out of space, everything stops. It’s also the case that some DAWs work more effectively if their data files are not stored on the same disk drive as the app itself and the computer operating system.
But as with headphones, there’s an argument for two external disk drives. Because along with a drive to store the live recording data, you ought to consider another one to serve as a regular, and perhaps automated, backup. And as far as drive technology is concerned, SSD types rather than traditional, electro-mechanical spinning disk drives are far preferable – on both performance and reliability grounds.
#8 – MIDI Controller Keyboard
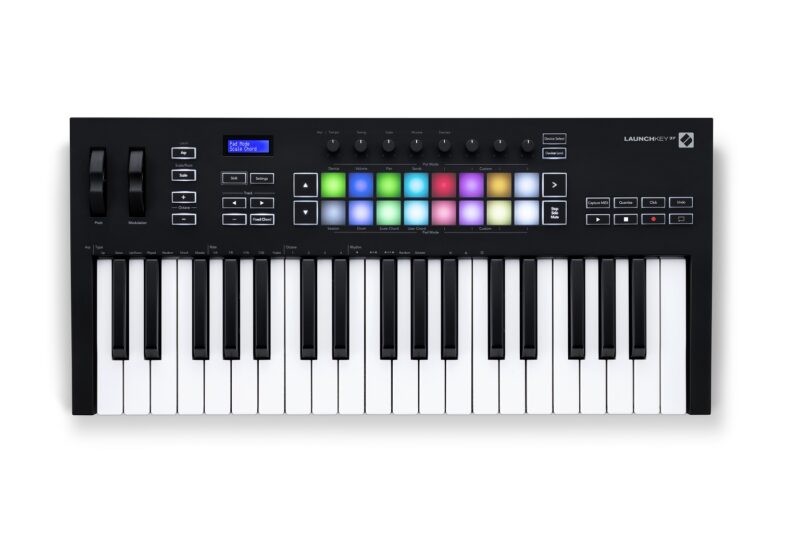
You may not consider yourself a keyboard player at all, however the moment you find yourself using software synth and drum plugins within your DAW you’ll need a way of playing them. At that point, a MIDI controller keyboard, connected either to your audio interface via a traditional MIDI cable, or directly to your DAW computer via MIDI over USB, will become all but obligatory.
MIDI controller keyboards are available in a variety of octave range and key sizes, and with a variety of additional expression controls – pitch bend, sustain, modulation, etc. They generate no sound themselves but are simply used to control and trigger external synth or drum modules or their computer based software analogues. If you happen to be a keyboard player, you might prefer a relatively large (seven octave) keyboard with weighted, piano style keys, and that will cost a little extra, but if you’re not a keyboard player, unweighted keys and a limited (two or four octave) range will probably be enough to get you started, and that won’t break the bank.
#9 – Acoustic Treatment
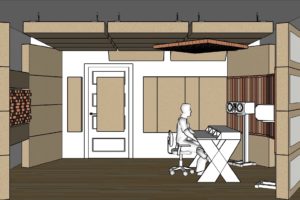
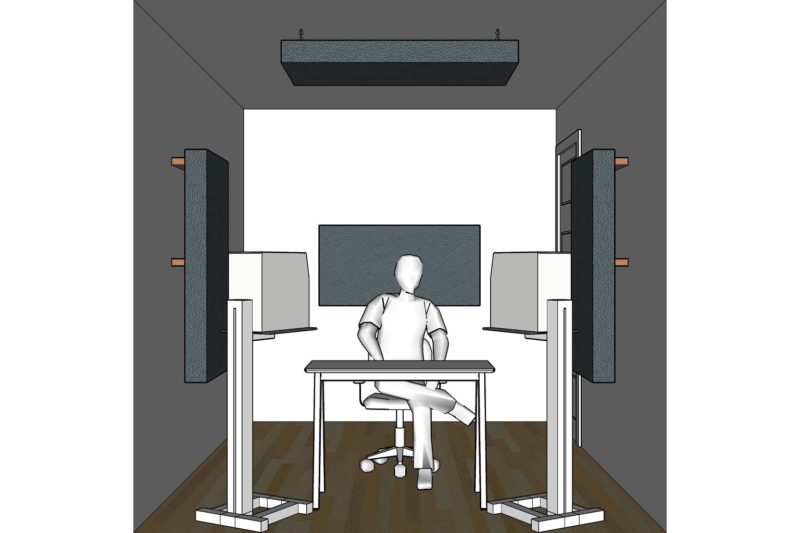
Like our seventh item, number nine, room acoustic treatment, is one that tends not to generate much excitement, but it’s important nonetheless. When you listen to your music in your home studio room, it’s not just your speakers that influence how things sound, the acoustic signature of the room also makes a significant contribution. And because every room is different, it’s vital that yours doesn’t color the sound to such a degree that your music only sounds as you want it to sound in your own room. In commercial studios, significant sums of money are spent on acoustic treatment in order to control the influence of room acoustics, and while you probably will have little home studio budget left after reading about the previous eight indispensable items, there are still things you can do.
The first job is to read a little about room acoustics and develop an understanding of how your studio room might be influencing what you hear. And the second thing to do, with the knowledge you’ve gained, is to consider the acoustic characteristics of your room, how it is arranged and if either could be better. Is the room too “live”, dominated by acoustic reflections? If so, hang some heavy curtains and invest in some rugs. Are the two monitors a similar distance from walls and corners? Are the monitors positioned at head height when you’re listening? They should be. Are the locations on the side walls of the room, where sound from the monitors will reflect to reach your ears at the listening position, of similar reflective quality, because it’s better if they are.
When you’ve experimented with your room and optimized the layout as much as possible, it might be time to invest in some acoustic panels to absorb and diffuse the acoustic energy that’s bouncing around the room. There are numerous online resources that can help you choose the appropriate level of acoustic treatment and position it appropriately. Get it right and it will potentially make a huge difference. One of the most frustrating experiences of home studio composition and recording is to find that a piece you’ve put your heart and soul into sounds completely wrong when you play it at a friend’s house. Getting your home studio acoustics right will play a significant role in making sure that doesn’t happen.
(For more information, please refer to our blog article “Do I Need Acoustic Treatment For My Home Studio Setup?“)
#10 – A Coffee Machine
And finally. Music composition and recording is famously lubricated by quality coffee, so no studio is complete without a good coffee machine. We’re actually only half-joking here. Taking regular breaks to make a hot beverage will help you to take a step back from your current project and return to it with a fresh mind.
You can’t have a fridge for the milk though, fridges are always too noisy.
Transform Your Bedroom Into A Studio [Tutorial]
By loading the video, you agree to YouTube's privacy policy.
Learn more
